And here is my fall themed board outside my door! ( I will have to change it this next week for winter!)
Monday, December 9, 2013
New Hall Display!
I finally updated our hallway art gallery to display some of the "shape" projects from each grade! Check it out!
Saturday, December 7, 2013
3rd and 4th Grade- Fall Foil Reliefs!
So, I was having a difficult time making up my mind on a texture related project for 3rd and 4th grade. It was also smack dab in the middle of my favorite season- Fall! So I eventually decided to let 3rd grade to a glue print of something fall, and 4th grade make these foil reliefs. Both grades started out the same way. I had them make a list of things that related to fall, and I wrote them on the board. I then instructed them to make a simple drawing (large and not many details) of their favorite thing about fall on a small peice of cardboard. I got a lot of pumpkins and candy corn! The next step was adding glue to the plate. The students used squeeze glue to cover their lines. They had to make sure the line was thick so that when it dried their would still be texture. Some students had drawn to small and detailed and their glue made a big messy blob. :( But we fixed it!
Now here is where my first lesson was learned. I attempted to teach my first class of 3rd graders how to print their glue plates. My example turned out fine, but the students had trouble understanding how much ink to use and they all turned out where you were unable to tell what they were. They were pretty discouraged. I then decided to let all of the other 3rd grade classes make the foil relief like 4th grade was. We can always try printing again later!
The next step of the project was to cover the whole plate with aluminum foil. Then the students pressed down with the side of their thumbs or with their knuckles to make their glue lines noticeable through the foil. I told them to press hard around the edges of the glue and get in all of the small areas really well so everything would stand out.
Here is where my next lesson was learned. I had a few of the fourth grade classes cover their plates with just a smudge of black paint and then wipe it away till they could see the image good. I emphasized only putting a tiny dab of paint on it and showed them several times. However, almost all of the students put way too much paint on theirs and other wiped too much off. So, for the classes I left, I decided to use a black crayon to rub over the image. They turned out way better and you can see their images very well! I guess you really do learn as you go!
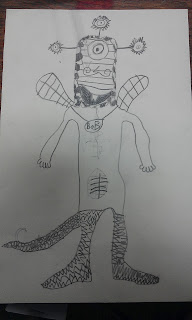
5th Grade- Implied Texture Creatures!
We began this lesson by learning about texture. I showed the students images of pencil drawing that demonstrated textures and talked with them about how we can use our pencils to show texture that can't be felt. I gave them a worksheet that included labled boxes such as "bumpy", "soft", etc. They had to use their pencils to fill in the boxes, making the boxes look like the correct texture. The next day I handed out a half sheet of paper and told the students that they had to come up with their own imaginary creature. They had to do a pencil drawing of their imaginary creatures that included texture. I told them that when the finished, I should be able to tell what the creature feels like just by looking at it.


They did great and I loved the results so much that I felt that I should share alot of pictures with you guys!


Friday, December 6, 2013
Kindergarten- Texture Plants!
This was a science integrated lesson that I came up with. The students first learned about texture and then made texture rubbings using crayons and texture rubbing sheets. The next day I handed out a worksheet about the parts of a plant ( a Kindergarten science standard). We talked about each part of the plant and what it's purpose was and the students filled in the plant parts on their worksheets.
Then I handed back their texture rubbing sheets and gave them a Sharpie marker. We reviewed the different parts of a plant and then drew each part seperatly on the texture sheets.
The next class the students cut out their plant parts and assembled the plant on a sheet of construction paper. They turned out great, and they learned alot about plants during the process!
1st Grade- Texture Creatures!
For this project, we began the lesson by learning about texture. I had the students name textures and I wrote them on the board. I also made some hands out of cardboard and glued actual textures to each finger. I put the students into groups of 2 and had them feel the textures and talk about them to their partners. Then, I had the students fold a sheet of white drawing paper 4 times (making 8 rectangular sections when you unfold it). The students used crayons and texture rubbing templates to create a different texture in each section. They had to fill up their whole paper.
The next day we reviewed shapes (from their previous lesson) and I had them cover their whole texture paper with small, medium, and large shapes using a Sharpie.
The students then cut out all of the shapes and assembled them together on a half sheet of colored construction paper in the shape of an imaginary creature from their own imaginations.
Subscribe to:
Comments (Atom)


